Jump to content

Flags 2008


Guest halvin
 Share

Recommended Posts

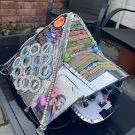
Been lazy this year, so we'll be updating last years :P

gallery_3314_717_42878.jpg

It will also be topped with the ever faithful 'egg of guidance' a high quality plastic egg with flashing lights .... pic to follow :lol:

Link to comment
Share on other sites

  • Replies 258
  • Created
  • Last Reply

Top Posters In This Topic

I like the name funky flasher :P

To scudetto_boy ...chill out and stop shouting, for you information mine and probably most others on this thread are for marking our camping area and help us find our way home, I for one certainly can't be arsed carrying a flag around all day, I can barely carry myself ! I agree that flags are annoying in crowds, but in the camping fields they add a bit of fun, humour and colour :lol:

Link to comment
Share on other sites

I hate flags because when you try to see the members of a band on stage, you can't because of the bloody flags! :D

Other than them being used while a live act is on, they're cool. :D

Please do not use them when you go to watch a band, they ruin the enjoyment of the gig! :P:P:lol:

Link to comment
Share on other sites

*bump*

New flag from HarrowStrongbowCiderman! & TimeSpeedsUp in the 2008 section. Sorry HSC, there isn't room in the 2007 section for your other flag (there's a 10 image per post limit).

Link to comment
Share on other sites

Ok so a few tips

1. Don't listen to hubby/partner/anyone who suggest you use "waterproof" material

2. Same as above when they tell you it's not a problem that all the paint is falling off

3. www.ebay.co.uk sell boxes of common sense I think ;)

4. Don't give up

5. Make another one!

6. Anyone got a spare 6 hours or so to help?

7. I could cry it's ruined I tell ye!

8. Ok so the first maybe one or two points were tips the others were just me fishing for sympathy and ranting <_<

Link to comment
Share on other sites

Ok, steps I took for my flag building...

First of all, I ordered:

from the great sky blue leisure. I reckon if you got on the blower to them they could organise some rapid delivery and you could get your stuff easily in time for the weekend. You'll probably also want a fine tipped paint brush from somewhere.

Next, i found a pic of a zebra i liked, and spent 2 days trying to figure out how to enlarge it to a 5 foot by 3 foot print size. Eventually came across a tip somewhere which said open up excel, insert the image you want, change to "print layout" view (or whatever its called) and expand the print size and your image to whatever size you want. My zebra for example was a 4x4 array of A4 pages. Alternatively, print out your image on a single A4 page, then hit your photocopy machine at work and do A4-->A3 enlargement over and over until you have your desired size. (The zebra was equivalent to 2x4 A3 pages).

Next I taped down the zebra to my kitchen table and gently stretched the flag over it (used 3M scotch tape the flag down so it doesn't mark and comes off easily). With a pencil i then traced which parts of the zebra pic I wanted. You'll probably find the fabric stretches a bit and will slightly distort the image, if you pay attention you should keep it under control.

IMG_1109.JPG

Once the trace was done, it was time to start painting. I read somewhere that permanent marker pens wreak havoc as they "run like f*ck" (to quote the other user who said that), so i used the method of paint the outline of each area with the fine tipped brush then coming back to fill in the middle. It means painting the edges takes a stupid long time, but the middles are much easier. Also found to get nice sharp lines, put a small blob down on the fabric a bit away from the edge, then "push" the blob ahead of the brush up to and then along the edge. Practise in the middle of some of the bigger solid areas you're going to paint to perfect your technique.

IMG_1111.JPG

Finally, once you're done and the paint is dry, its time to heat cure it. I made the mistake of trying to put a hot iron on a nylon flag. Not good. Never put a hot iron direct on nylon. Next I tried putting down a towel and ironing through that. It seemed to work, although i got bored of ironing such a large massive area for the specified number of minutes, so after giving all the painted bits at least a minute of hot iron, i put the flag, by itself in the tumble drier on its hottest setting for about 30-40 mins. From what i can tell, thats heat cured the paint. (Although this is a moot point since its not going to rain this year, right??) Thats pretty much it. The fabric paint, once cured, has the slightest "rubbery" feel to it - it gives the impression its on there for the long run and i have total confidence its not going to flake off ever.

To attach the flag to the pole, extend the pole and use the bungys. The bungy looks like an elastic band for long hair (i.e. covered in a fabric sleeve) with a single plastic ball / bobble attached to it. To use, thread the loop of the elastic through the eyelet on the flag then around the flag pole and then over the plastic ball. That simple. If you're right near the super skinny section of the flag, you might need to loop the elastic around the pole twice or maybe even three times before putting it over the plastic ball.

Finally, you may notice your flag, when fluttering in the wind, pulls away from the flag pole in the middle (i.e. away from the bungys). If you don't like it when it does that and want the edge of the flag to stay "lined up" with the flag pole all the time, cut a small slit just above the flag's bottom eyelet to make a "tube" out of that edge of the flag and thread the flag pole through the "tube". Use the bungys to secure as before.

Kewl beans. Flag building is so worth it, and helps massively build up the excitement factor! Its probably still not too late to start!

Link to comment
Share on other sites

Great posting 'mccdyl001'

You've taken as much effort with your posting as you have with with your flag. Great tips.

Are you sure you're a newbie?? <_<

"I read somewhere that permanent marker pens wreak havoc as they "run like f*ck" (to quote the other user who said that),"

Erm, that sounds like my comment! ;)

Yes when I used permanent marker pen it did run. This was the outline for my eFestivals "Dancing Man" before I painted in.

But to be honest 20' up in the air you don't notice at all.

Future projects I will probably tape around first before using pen or paint but of course difficult unless straight lines.

Link to comment
Share on other sites

Hi everyone,

Just put the finishing touches to my flag over the weekend - you can see it here: http://www.flickr.com/photos/47526797@N00/2584758559/

The tips on here really came in handy, though I didn't pay enough attention to the one that says how much the paint bleeds through to the other side of the fabric.

It really does - I now have half of Saturday's newspaper stuck to the back of Tintin's head!

Anyway, for anyone (like me) who can't draw, here's how I blew a tiny, fuzzy image up to a large enough, crisp enough size to be of use:

  1. Get your image - this works best on line-art images

  2. Go to http://www.vectormagic.com/. This fantastic site lets you convert bitmap graphics into vectors. (You can blow a vector image up as large as you like without losing any quality - so you get a big image that's good enough to trace round.) If you register it'll let you download a couple of images for free.

  3. Open in it something like Paint.NET (do a Google search) and resize it so it's massive (I measured my flag, and made the image just a little smaller.)

  4. Save it as a GIF or other common file type

  5. Then use the 'poster' option in Microsoft Publisher to print the image across several sheets of paper. I recommend using the work printer for this.

  6. Tape the sheets of paper together, lay your flag over it, and get tracing in permanent marker

  7. Paint the colours on in the right places

Easy as that. Oh, and you have to iron it to make it waterproof. I'm sure that won't be an issue this year, but it pays to be careful!

Come and say hello if you spot me!

Cheers,

John.

Link to comment
Share on other sites

Yeah, might have only joined recently but been watching the forums for quite a few years - a "silent reader"..

Anyway, meant to also say, for the grass on the zebra flag, we were looking for a way for all the people in our glastonbury camping group to get a way of putting something into the flag - in the end we decided on using red, blue, yellow & green colour paints to paint our hands and then use hand prints to make the grass. Of course by the time we got round to it everybody was quite hammered (it was at our glastonbury warm-up party), so the grass got a bit out of hand. But if you look closely at the large version of the photo you can indeed see its made up of hand prints. (You can also see the vodka & coke stain by ol' zeb's head). I reckon it came out real nice and is such a shweet way of getting everybody involved. <_<

Link to comment
Share on other sites

Join the conversation

You can post now and register later. If you have an account, sign in now to post with your account.

Guest
Unfortunately, your content contains terms that we do not allow. Please edit your content to remove the highlighted words below.
Reply to this topic...

×   Pasted as rich text.   Paste as plain text instead

  Only 75 emoji are allowed.

×   Your link has been automatically embedded.   Display as a link instead

×   Your previous content has been restored.   Clear editor

×   You cannot paste images directly. Upload or insert images from URL.

Loading...
 Share

  • Recently Browsing   0 members

    • No registered users viewing this page.


×
×
  • Create New...