


vestan pance
-
Posts
15 -
Joined
-
Last visited
-
Days Won
1
Content Type
Profiles
Forums
Blogs
Gallery
Store
Posts posted by vestan pance
-
-
Red button > Peel Stage > watch from start > FF to 5:30
-
Two wrongs don't make a right.
-
The challenge is to get them to hang up first. I usually let them start their sales pitch and then interrupt with "yes, yes, we'll get onto the details shortly but first of all could you slowly describe to me what you're wearing..."
-
 1
1
-
-
-
It's only drilling some holes and screwing a few bits of wood together, it took me longer to make this post. Good point on the corners though, I shall file those down.
-
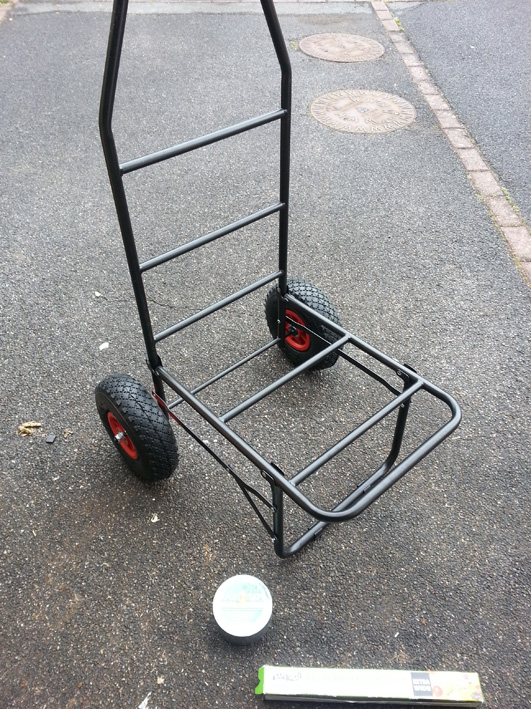
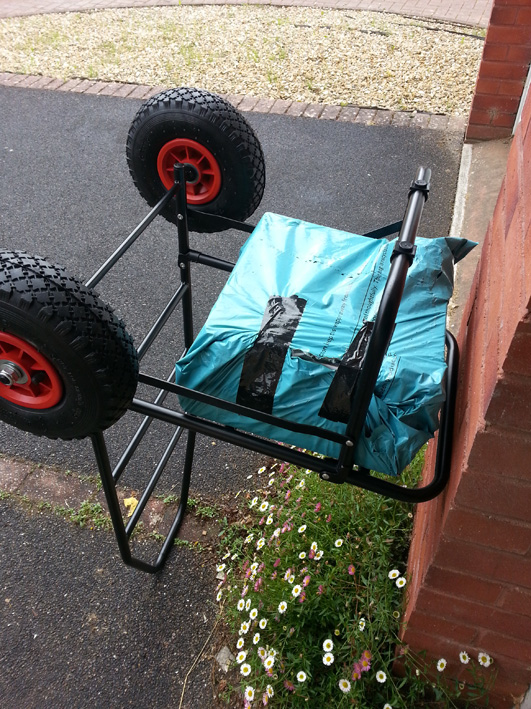
We've got a couple of friends from America joining us this year so I've been putting together a basic trolley package for them. It needs to fit in the car with all our kit so I've been searching for a good compromise between simple, sturdy and compact and this is what I've come up with and thought I'd share it. Hopefully it might help somebody looking for something similar. This is designed to be easily broken down on site and stored in tent. You'll need a multitool/knife to cut the cable ties when you get there and don't forget to take the wheel spanner (very important!) gaffer tape, cling film and cable ties for the return journey.
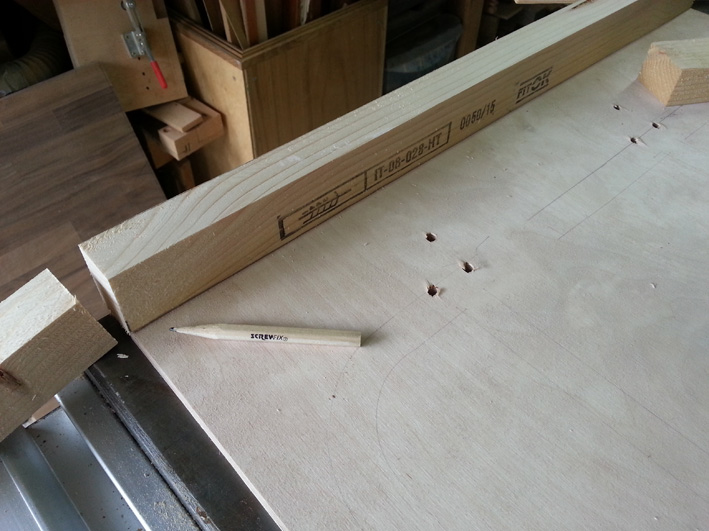
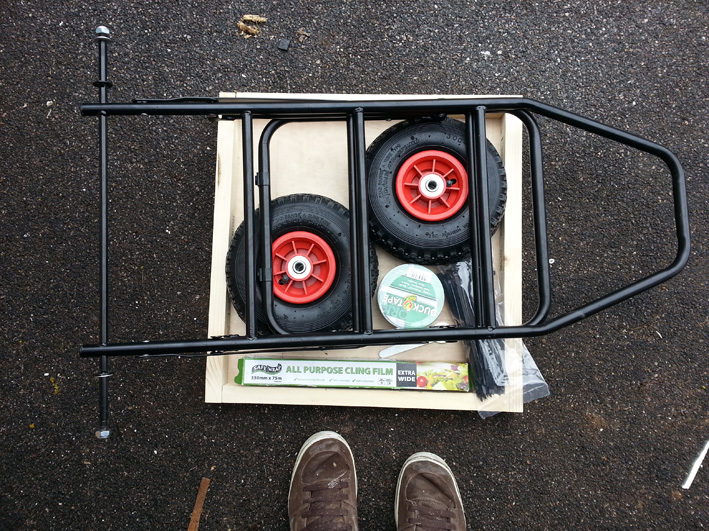
The trolley is a fishing version, found on ebay for about £30 delivered. These fold flat and have bolt-on pneumatic wheels which are essential on any trolley.
Here's what you'll need:
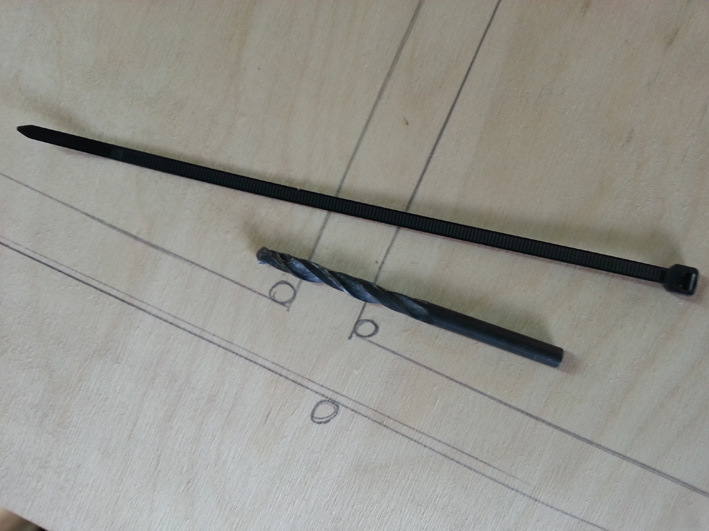
Trolley, Piece of plywood for base, wood for lip around base (I think this was about 1"x1.5"), Screwdriver/drill, gaffer/duck tape, cable ties, screws (about 30mm), small drill bit for pilot holes (around 2.5mm) and one for cable tie holes (8 or 9mm), pencil, saw (not pictured).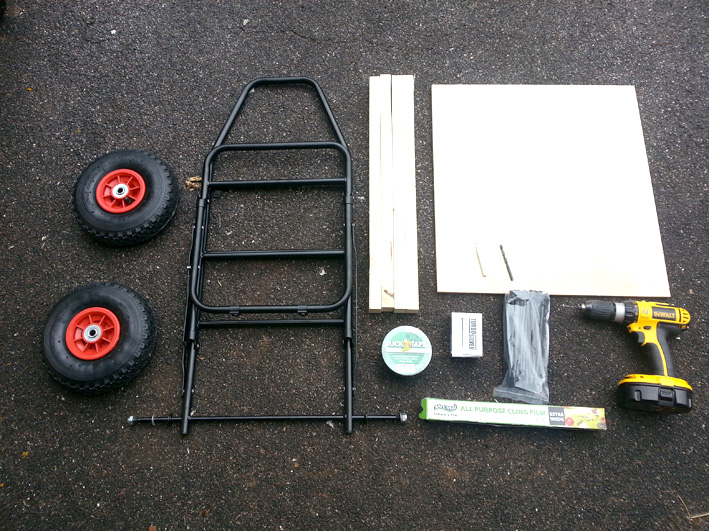
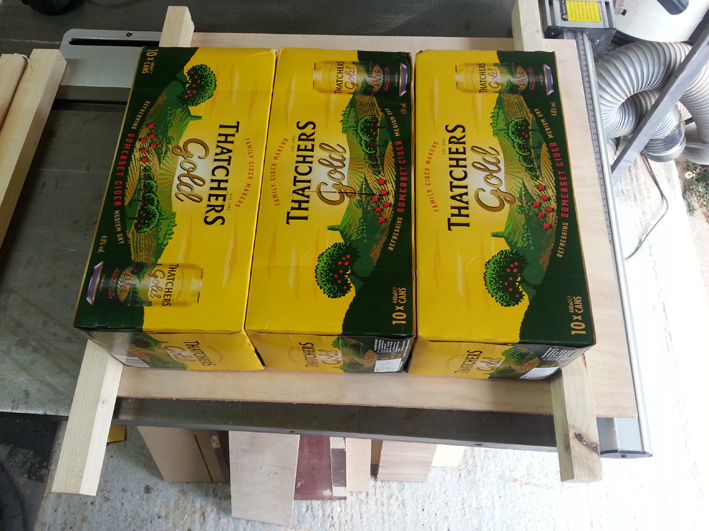
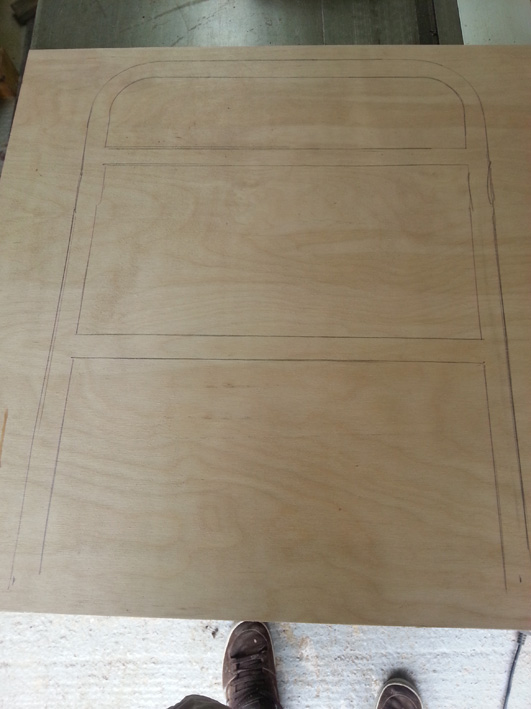
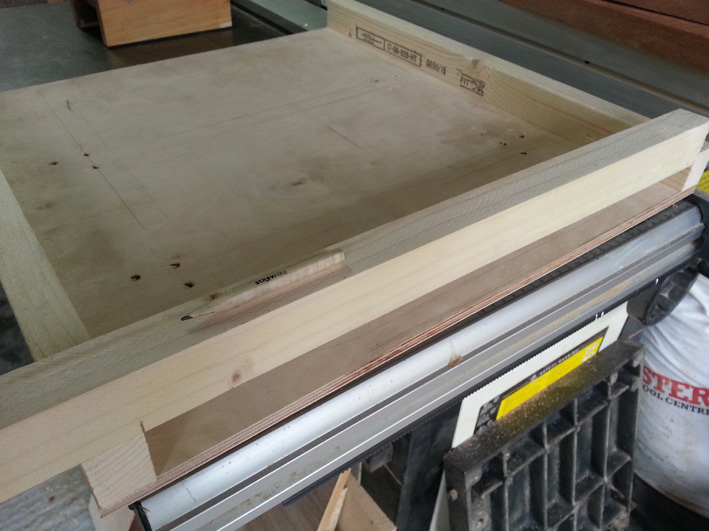
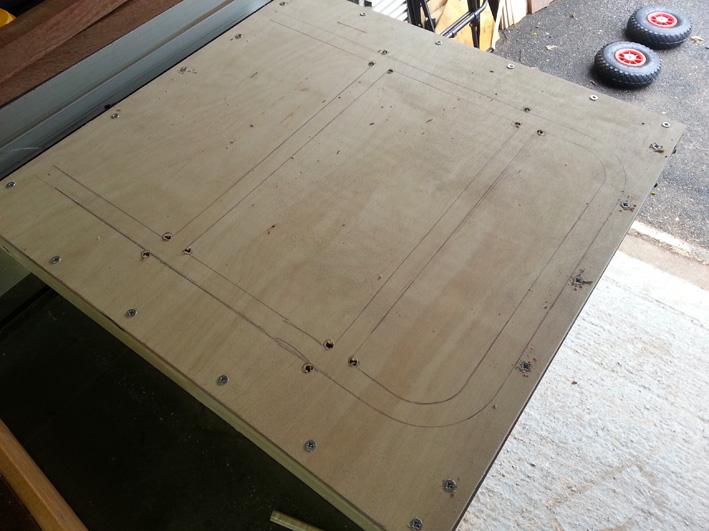
Step 1: If you've already got your booze layout your cans on the ply and place lip wood outside. If you can create a snug space for it all the better. Mark and cut ply to width. For the length I added an extra 20cm or so to allow room for chairs and tent to sit in.
Step 2: Lay the trolley on its back, put ply in place and mark around all the bottom bars.
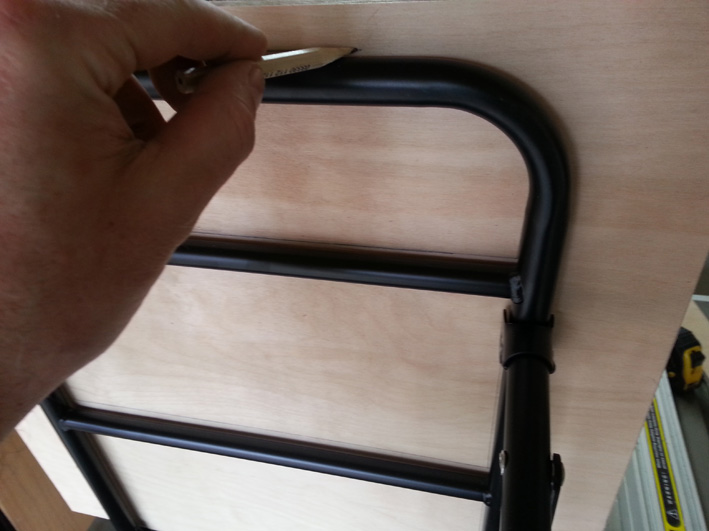
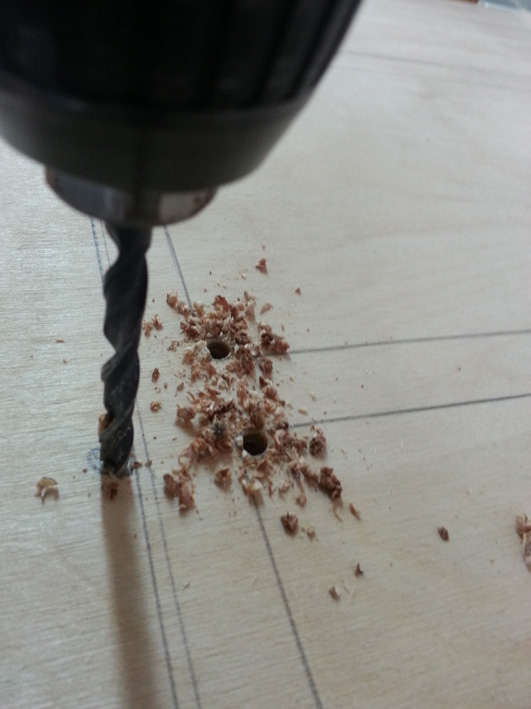
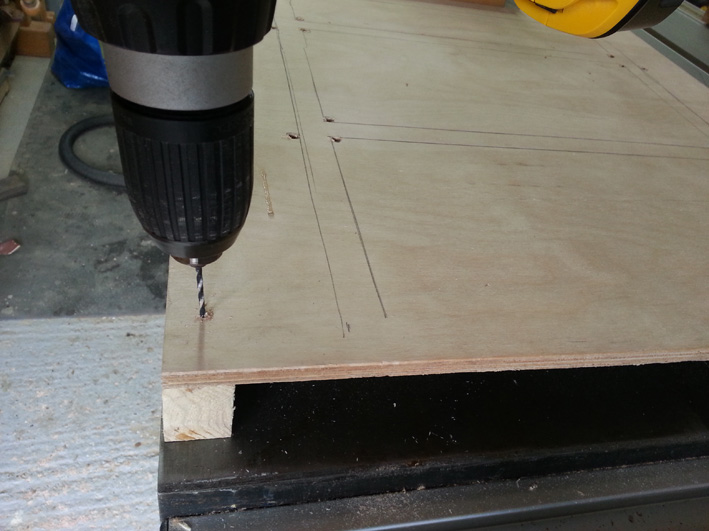
Step 3: Mark holes around the bar joints. I put these at the back of the bar which should prevent it moving forwards.

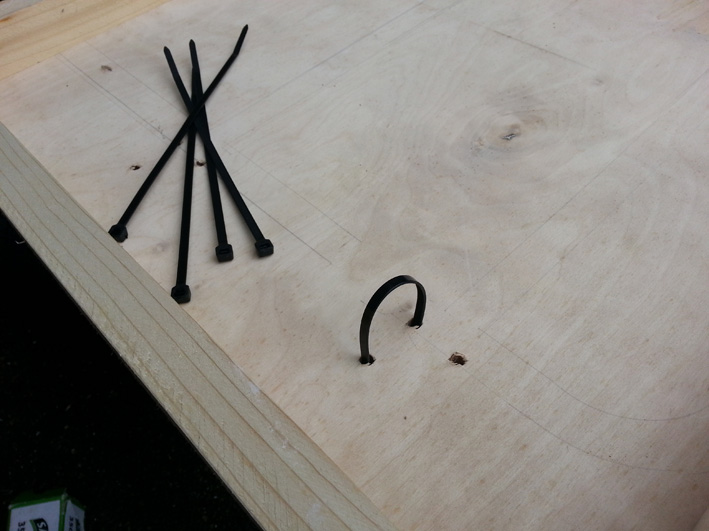
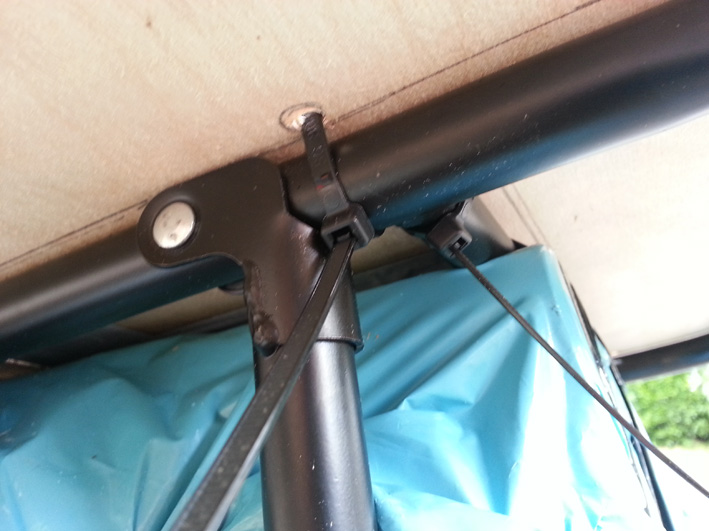
Step 4: Get your large drill bit and cable ties, check the holes will be big enough, drill holes.
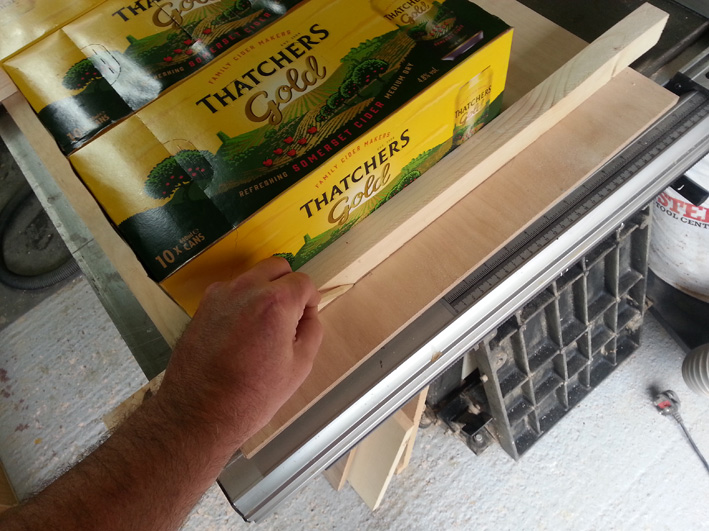
Step 5: Lay the lip wood along the sides, mark and cut.
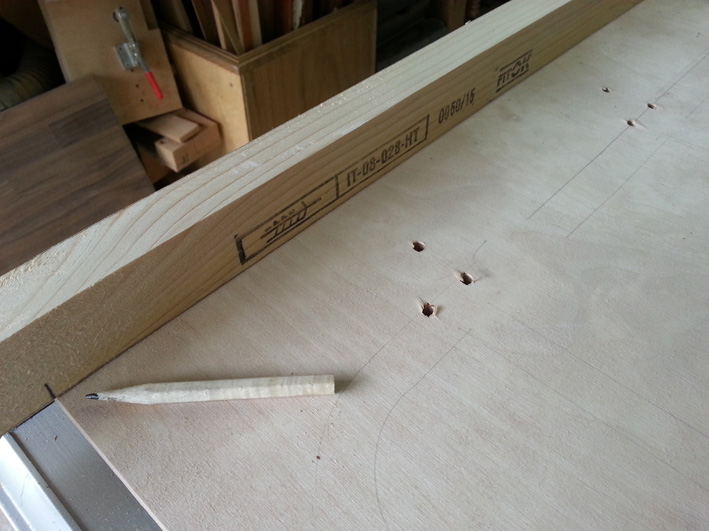
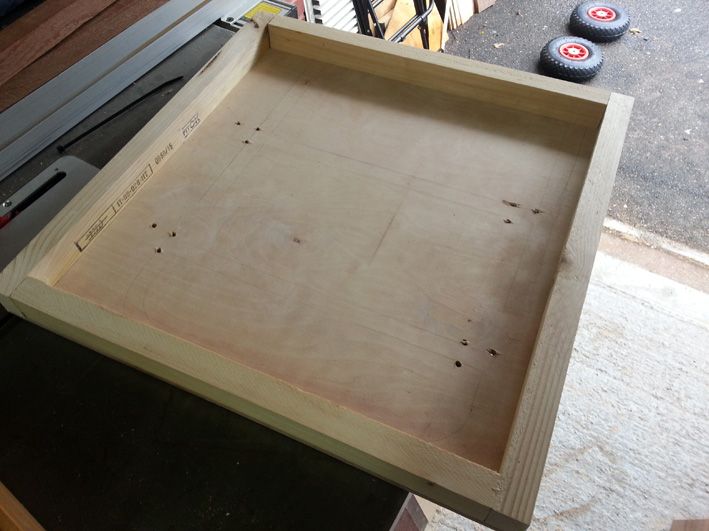
Step 6: Flip the ply and sides over, drill pilot holes with small drill bit and screw together. About 5 on each side should be sufficient.
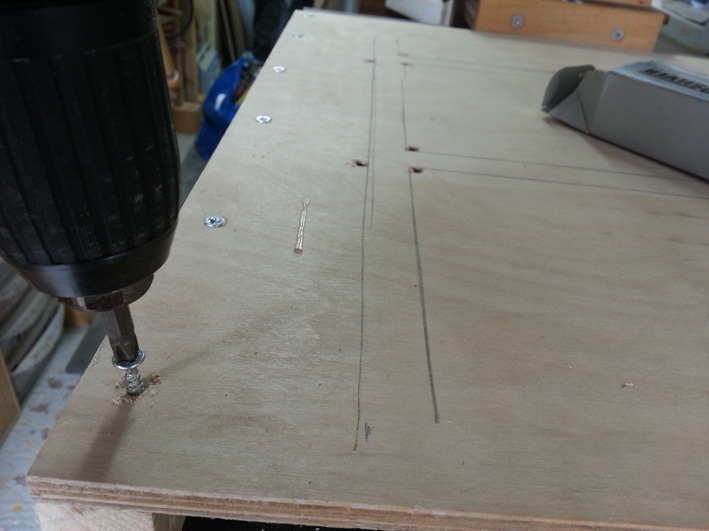
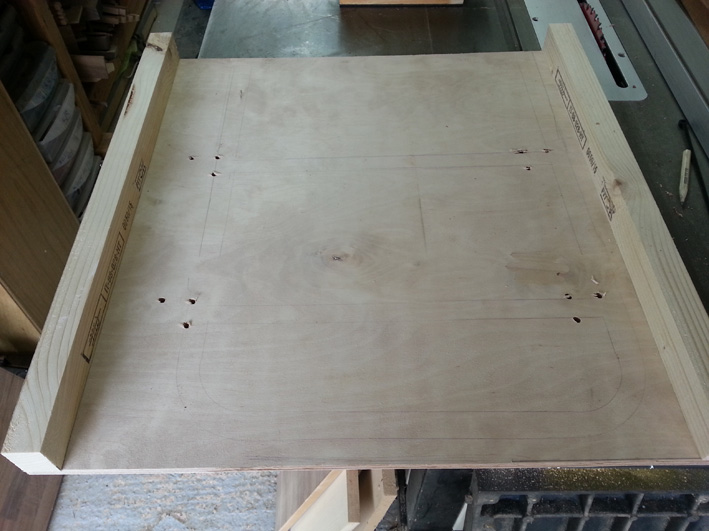
Step 7: Lay front and back lip pieces in place, mark and cut. Repeat Step 6. Base is now complete.
Step 8: There's a lot of room underneath the base on these trolleys so I'll be putting inflatable mattresses under there. Gaffer tape the hell out of them.
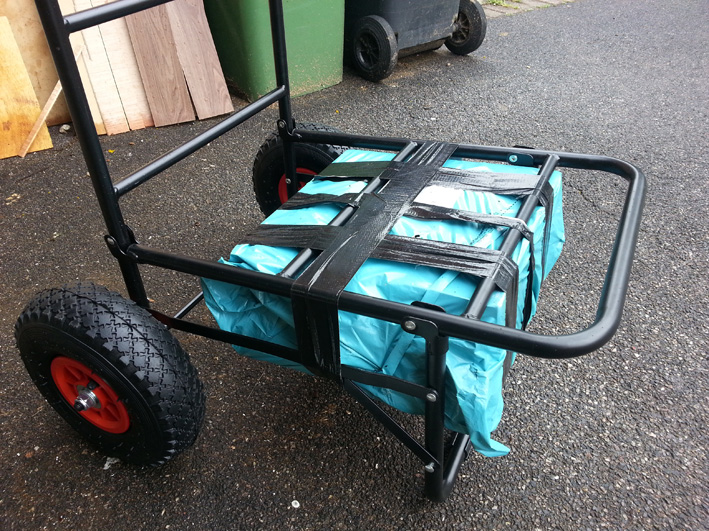
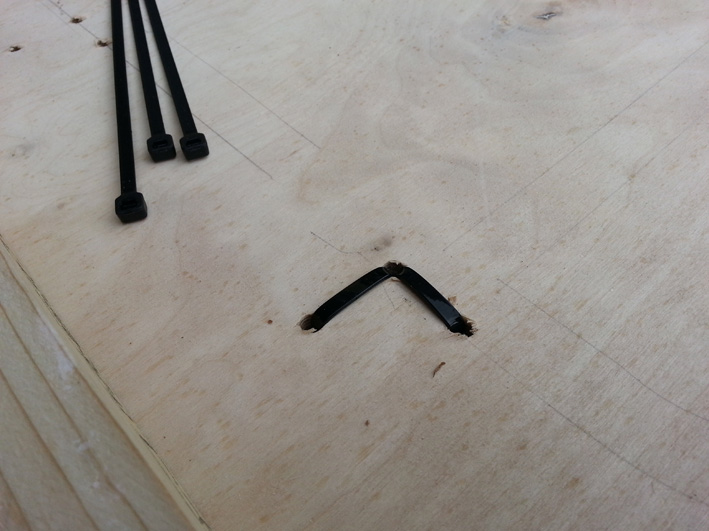
Step 9: Add tray, feed cable ties from underneath and back down through holes and pull tight.

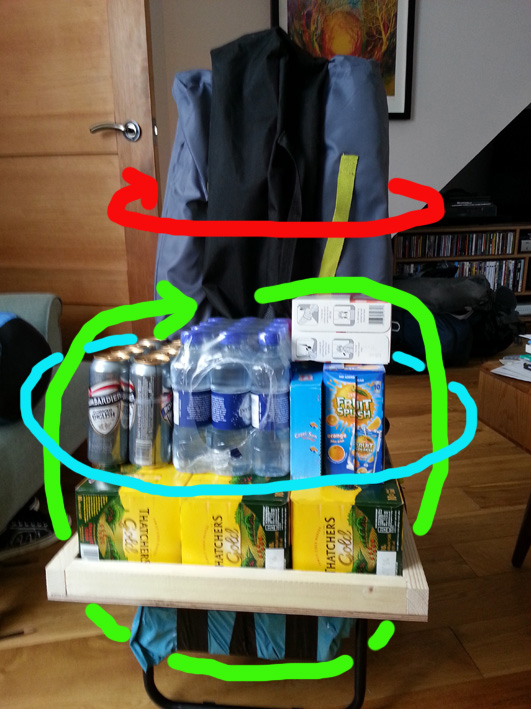
Step 10: Go to Glastonbury and pack that badboy up. Cling film as shown by the arrows. Gaffer tape over the cling film if needed.


-
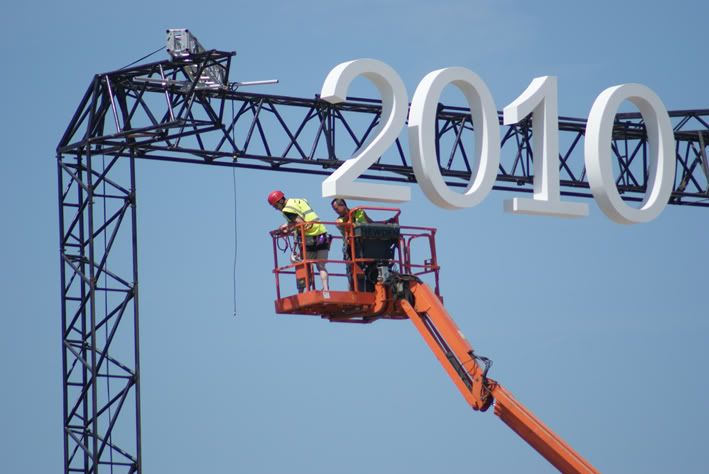
2010. Where there's a will, there's a way.
-
Wandering through the green fields at about lunch time when a guy casually strolled across in front us wearing nothing but a hat, a big smile and a rather impressive erection. He was also spotted by somebody from Radio 1 who named him 'Hippy with a hard-on'.
-
-
I blame the Welsh.
-
-
Cheers for the compliments on my pics people, tis much appreciated.
Hey, got a dSLR 6 month ago, NIKON d3000 with 18-55 mm VR Lens, just wondering what peoples advice would be for buying Glasto related camera essentials.
Without doubt, one of these - Crumpler Half Muffin bag. All your kit safely underneath, and room for beers, jumper and other essentials up top. There's an ex-demo for £45 on ebay.
-
-


P!ss!ng on the farm
in Chat
Posted
What happened to simply booing people? It's certainly more effective than internet naming and shaming.